Go to... | Start A New Topic | Search | Notify | Tools | Reply To This Topic |
| Setting Up A Toad | Login now/Join our community |
 |
After 4 years of towing our small Mazda Tribute SUV on a dolly, I finally traded my Chevy Silverado 2500HD for a smaller GMC Canyon that can be towed 4-down. My first call after getting the Canyon was to BillyT at Billy Thibodeaux's Premiere RV, Inc.. Might as well get advice from the best. I told Billy what I had bought and that I wanted to tow it. He rapidly ran off a list of things he recommended. I ask him to send me the recommended items (and stand by the phone for questions). The Adapter plate for the Canyon was a very straight forward installation and only required 2 holes to be drilled in the front of the frame rails and minor trimming of the front skid plate. What skid plate?? It's plastic!! The neatest part of Billy's recommendations were the Tail light system and the Braking system. The Tail Lights involve removing your tail light housings and drilling a 1" hole in the side and installing an extra 1157 light bulb in each side. These are then wired just like they were on the back of a utility trailer. NO MODIFICATIONS are made to the trucks wiring. 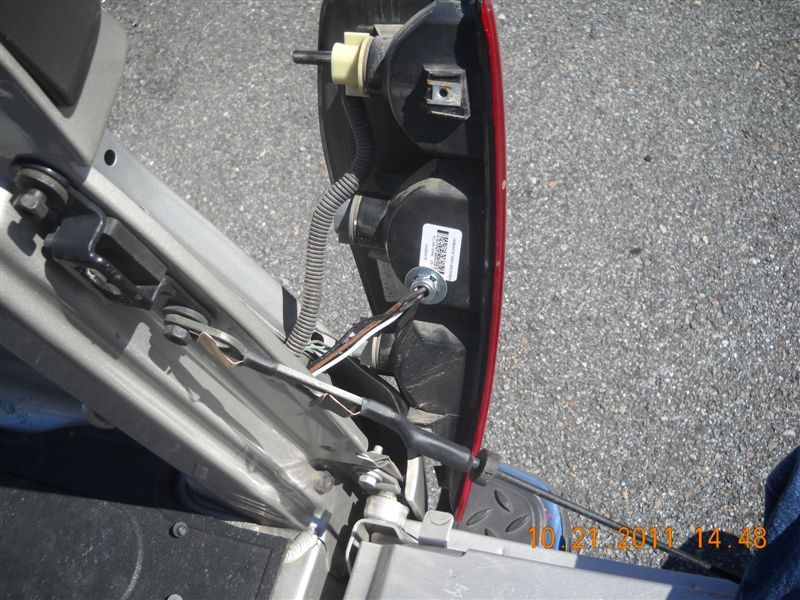 The Braking system is even better. The system is from M & G Engineering. It involves installing an airbrake activator between the booster and master cylinder on the truck (toad). Below is a picture of the activator installed. Also note that the master cylinder has been moved forward about 5 inches and the battery must be replaced with a smaller battery. This is all covered in the instructions, even what size battery to use. 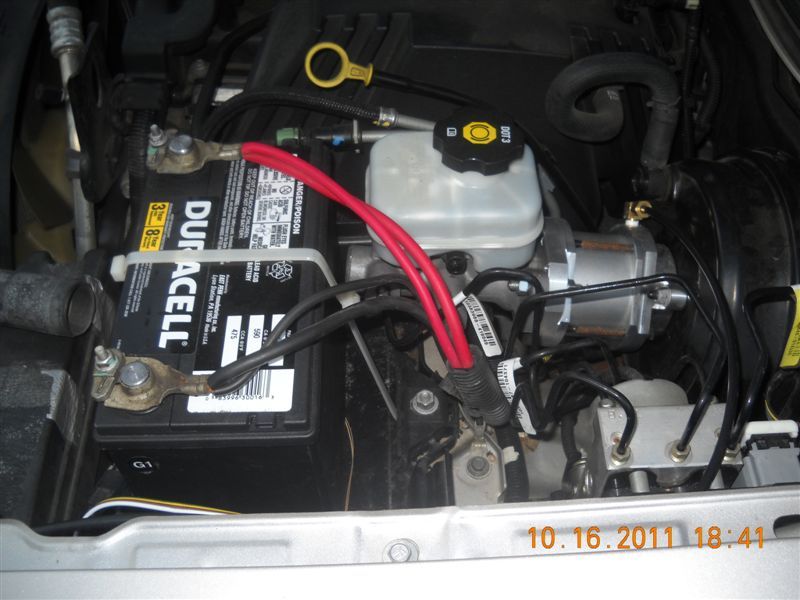 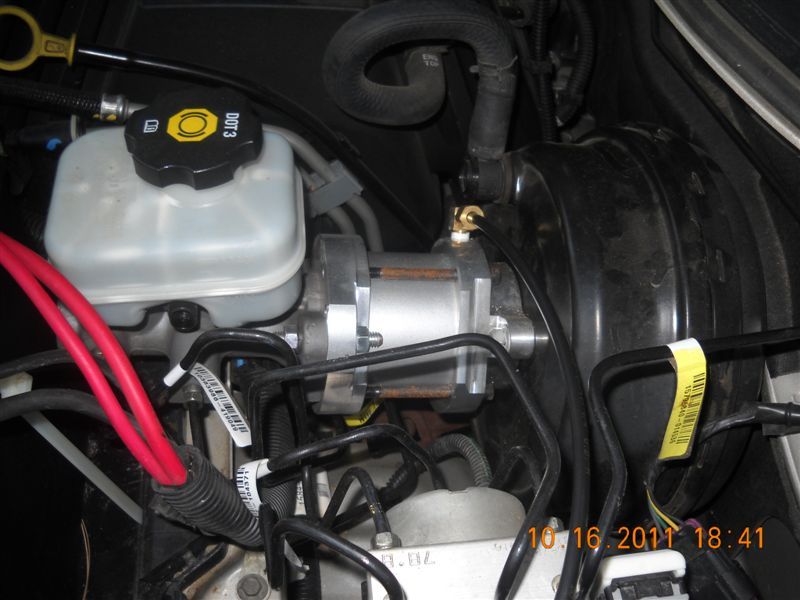 The air to the toad is supplied by a 1/4" line tapped into the rear brake valve. Brake valves found under the coach. The valve on the left is the Parking Brake. The valve on the right is the coaches rear brakes. 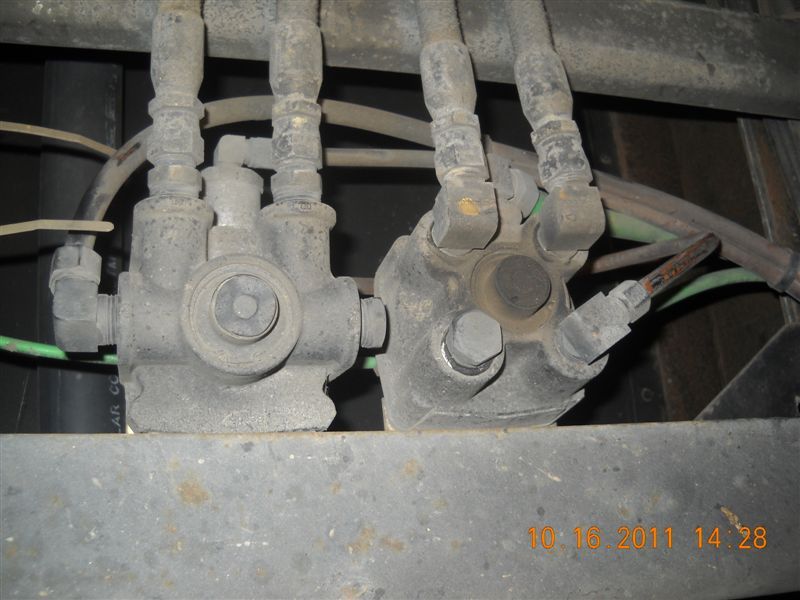 Here is a picture after removing the 1/2"NPT plug and installing a reducer and 1/4" air line to the back of the coach. 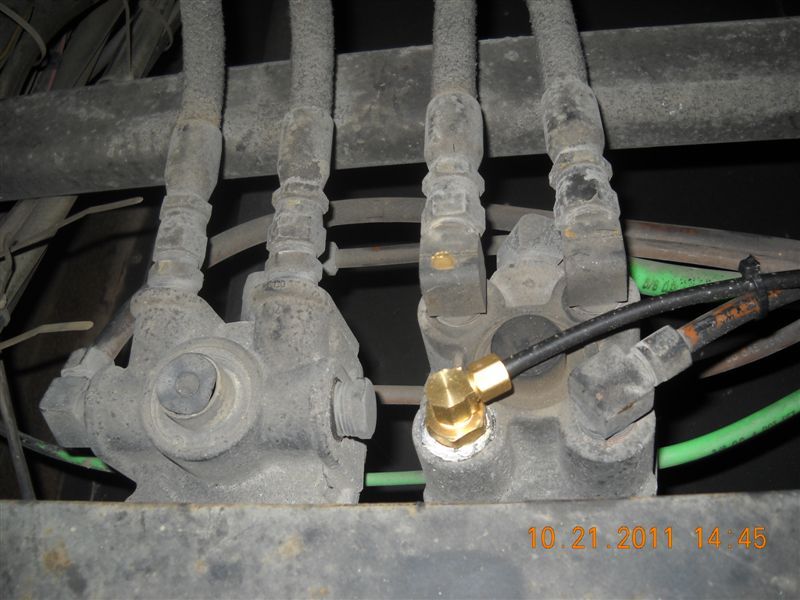 The Lights, Brakes, and a safety Breakaway cable are all attached here at the rear of the coach. 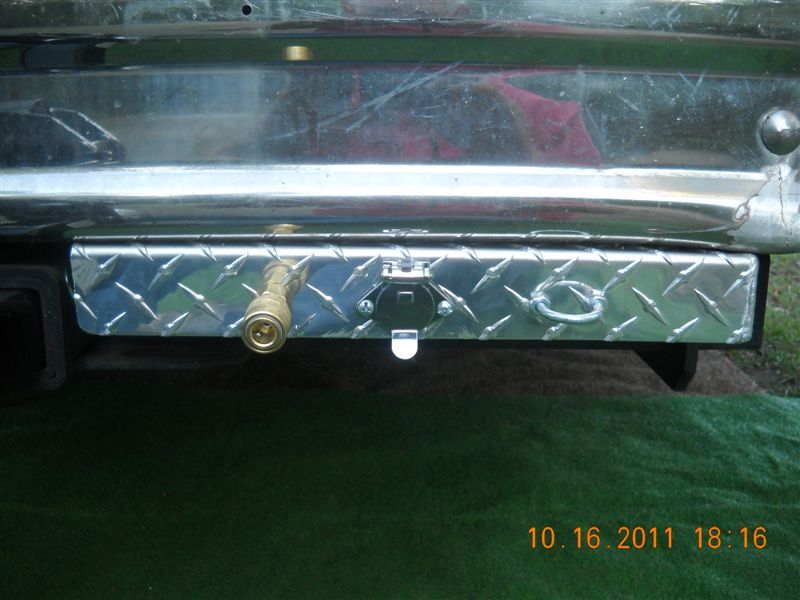 These are the cables used for the hookups. Black air line for the Brakes, Blue cord for the lights, coiled cord for the Breakaway system. 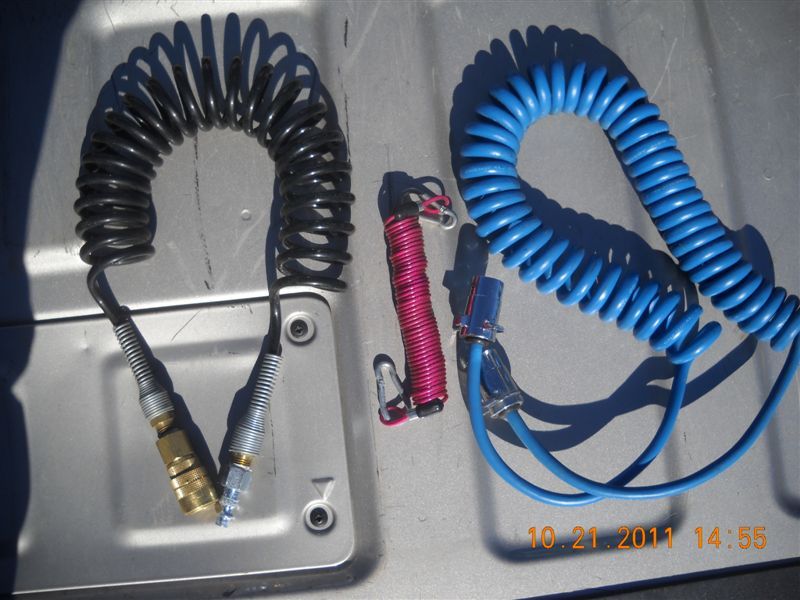 All and all, very happy with the installation and easy of use. Guess you could say my little truck now has Air over hydraulic brakes Nick | ||
|

Nice setup Hank. I have about the same m&g air brake setup. works great and easy to set up with a blue ox tow bar. I did the same on on the electric hookup for the wrangler. Take care. Ray and Anne 1990 Barth Regency 32RDGB1 Wide Body 3208 Cat 250 HP Gillig Chassis Center aisle | ||||
|
| Powered by Social Strata |
| Please Wait. Your request is being processed... |
This website is dedicated to the Barth Custom Coach, their owners and those who admire this American made, quality crafted, motor coach.
We are committed to the history, preservation and restoration of the Barth Custom Coach.
We are committed to the history, preservation and restoration of the Barth Custom Coach.