Go to... | Start A New Topic | Search | Notify | Tools | Reply To This Topic |
| Barth Broke on weekend Outing | Login now/Join our community |
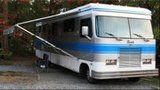
I thought I would share a recent R/V experience my wife and I had with our Barth, this post may be better placed in a techincal forum. First, our Barth is a 1984 P30 something with around 40-50k miles on it. I am not certain what the mileage is since the cable was disconnected when we bought it. I removed the cruise control and installed a speedometer cable that extends straight from the transmission to the speedometer. I also replaced the plastic speedometer gear as the gears were stripped, but not from over speeding  We camped with two other couples and enjoyed two Dutch Oven meals….a camping must IMHO.  On our way home (about 130 miles) the Barth suddenly downshifted while exiting I95 onto R17 off ramp…this was purely coincidental and very fortunate for my wife and I. I was able to drive the waffle house parking lot and immediately checked my transmission temperature and fluid, it was running as cool as I could expect, and the fluid level and smell were ok (burnt fluid stinks real bad). I also checked the vacuum signal to the modulator valve and it was fine, in fact, my dash-mounted vacuum gauge is tee’d into the same line so I know I had vacuum. I also found that reverse worked perfectly. We left the parking lot and immediately found that the coach would not shift, so I nursed it to a large parking lot and called “Coach Net.” I made the decision to join FMCA and Coach Net before driving the Barth more than a mile from our house, and it payed off! I gave Coach Net our location, which was about 50 miles from our home, they then noticed that the Barth was a 1984….they asked who I preferred to work on it, my reply was “ME”. They then decided to have the Barth towed back to my home! I was astonished, and they told me that this was an exception because of the age of the Barth and it was a Sunday afternoon. It was not long (20 minutes) before a guy in a roll back showed up, with a smile. He then called someone else with a mid-size tow truck. They hooked me up, removed my drive shaft and we were home in an hour! The whole experience only delayed our arrival home about two hours. That isn’t bad!  Today I finally had a chance to pull the pan on the transmission (TH400, or 475, I am not sure) and the fluid was clean. I then pulled the governor from the tail housing. The governor regulates pressure in a hydraulic circuit that controls gear changes. I found the governor is also driven with a plastic gear, and that gear was worn out!  I have learned since that it is common for these gears to wear out due to rust on the shaft that drives the gear, and the rust is culprit of a transmission that sits still over a period, which my Barth did some serious sitting. I have ordered a new gear and gasket and hope to get it going this week. I also peered into the hole and I saw rust on the gear that drives the governor. It is only surface rust, so I was able to use a screwdriver to clean it (a small metal brush would work) so I feel comfortable that I will not have a problem in the near future. I have learned since that it is common for these gears to wear out due to rust on the shaft that drives the gear, and the rust is culprit of a transmission that sits still over a period, which my Barth did some serious sitting. I have ordered a new gear and gasket and hope to get it going this week. I also peered into the hole and I saw rust on the gear that drives the governor. It is only surface rust, so I was able to use a screwdriver to clean it (a small metal brush would work) so I feel comfortable that I will not have a problem in the near future.The points to this LONG note is PLEASE check or have checked the governor gear on your Chevrolet powered coach if it has been sitting! A new gear and gasket is less than $5.00 on-line and you do not have to drop the transmission pan to check it, also check the speedometer gear as it does not require a gasket to check. This falls in line with preventive maintenance for our older coaches. If anyone else finds another of these “sitting” related issues, please share it. Drive Safe! Doug Bywaters Near Skyline Drive Virginia!  | |||
|

| First Month Member |
This gear was discussed in http://barthmobile.com/eve/forums/a/tpc/f/3631087061/m/...61068061#2961068061j a while back. I should add that the failure I had occurred on a car that was pretty new and was driven daily. It had no rust. My own hypothesis is that hard work and high temps distorted the case at one time or another, and the result was a slightly out of round hole that tightened up when warm. As mentioned in the thread, after a repeat, I used a brake hone in the case bore to make the problem stay away. . 84 30T PeeThirty-Something, 502 powered | |||
|
"Host" of Barthmobile.com 1/19 1/19 |
Excellent post with plenty of pictures - Thank you! Will also add a shortcut in "Tech Talk"
| |||||||||||||||
| ||||||||||||||||

Barthmobilers who have experienced Doug's problem may also want to consider a complete governor R&R....the whole unit, w/gear, can be had for under $20.00....same for the vacuum modulator..... | ||||
|
Did you notice if the output shaft was pitted with rust? Some believe you should rebuild the transmission if there is rust on the output shaft driving the nylon gear of the governor. I feel that may be a little overkill, but if there is rust on the output shaft it could destroy the new nylon gear. What has been your experience so far? Larry A. Barry DDS 2006 Tiffin Zephyr NV5I | ||||
|
So far I have only driven it about 10 miles, I could see rust on the spiral cut "gear" on the output shaft. Because of the angle I could not see if the shaft was pitted. I used a screw driver and pb blaster on the shaft. The rear half of the drive shaft had been removed because of the tow job allowing me to turn the shaft using the parking brake drum while holding the screw driver tip in the spiral groove, similar to a very slow lathe. I know this sounds very shade tree....but I figure that I can inspect the plastic gear after 100 miles to see if there is any wear. I had put around 400 miles on the coach prior to it failing so one or two hundred miles followed by an inspection is worth the risk IMHO. I do not have a coast to coast trip planned any time soon. I also mopped out any PB Blaster with a towel (I only used a couple squirts). The fluid drains back toward the valve body, and since I had the pan off I think I got most of it an any rust scale that was flaked off. My fluid was good, not burnt and there was minimal clutch material in the pan. The transmission had to be raised with a jack to allow access to the pan bolt located in the rear of the pan, I also inspected the rear mount while I had those bolts out, it was ok. I replaced my modulator valve too, but it shifted just like it did before. It seems that it does not like to down shift if traveling over 45mph. I don't have a working tach, so I don't know what RPM I am turning to know if this is normal. If I were to do it again I would purchase an entire governor assembly with gear. The replacment gear needs to be drilled and I believe it may require more precision than I gave it, but it seems to work fine. The assembly does not cost much and it really is not too difficult to replace, provided one can fit under the coach....which is a challenge for me Doug Bywaters Near Skyline Drive Virginia! | ||||
|
| First Month Member |
I think plan A would be to carry a complete spare governor and gasket. Or at least a predrilled spare gear. That will make it easy to get home. Plan B would be to ease the bore in the case with a brake hone. Plan C, if the problem reoccurs, would be to remove the trans crossmember, tilt the lower end of the tranmission down and remove the tailshaft housing. That should give you the availability to clean up the pits on the drive spiral with a narrow Cratex or Brightboy wheel, then polish it up. This will depend on the depth of the pits and the skill of the cleaner-upper. Plan D would be to have the tailshaft replaced. I have suffered the slings and arrows of spiral drive gears. They can be fussy. So, a replacement shaft might be the way you end up, anyway. It's the only sure thing, when combined with easing the bore or replacing the tailshaft housing. Plan B addresses rotational friction of the governor in the case. Plans C and D address rust pitting on the spiral threads on the output shaft. Both can be causes of tooth failure on the nylon gear. . 84 30T PeeThirty-Something, 502 powered | |||
|
Great advice. I'm removing the governor this evening just to look at mine while I have the trans pan off. Champion Transmission can replace the nylon gear on mine and polish the valves for less than $20. I'm going to get a spare governor and gasket from them when I bring my current one in. That way I can make sure they are an exact match. I don't really want to remove the output shaft to see if it's pitted. Maybe I can go across country without the output shaft destroying the new nylon gear. My girth makes it hard to crawl under that beast as well! Ha! I just inflate the tires to 80 psi to get that extra clearance. Larry A. Barry DDS 2006 Tiffin Zephyr NV5I | ||||
|
| First Month Member |
While you've got the pan off, drill a hole in it and install a B&M Drain Kit. Throw away the 1/8 NPT plug and install a 1/8 NPT temp sender for your trans temp gage. Keeping track of trans temp and changing fluid is important if you tow or climb. . 84 30T PeeThirty-Something, 502 powered | |||
|
| First Month Member |
If you want to drill the gear with precision, there are a couple of ways I have used. 1: wrap transparent tape around the old gear, with the edge up against the teeth. A heavy grade, such as that used for packing is best. Carefully remove the tape and place it similarly on the new gear. Using the mark on the tape from the old hole edges, center punch the new gear and drill a small hole. Install the new gear on the governor, aligning the hole. Use increasingly larger number drills to drill the first hole to the proper size in the nylon gear. After a number 31, finish with a 1/8 bit all the way through. 2: If you have a drill press and a drill vise, jig up the old one, remove it and drill the first hole with the new one in place. You could also make a hardwood drilling block and clamp it down. Make the hole a trifle undersize, and finish up with the 1/8 drill bit. If there is any doubt, drill the spare gear before the trip, and it will be candy to install alongside the road. 3. At work, just to BS someone, I used a vertical mill, but that is way overkill. All of this might be more than necessary. . 84 30T PeeThirty-Something, 502 powered | |||
|
There is no subsitute for experience, thanks! I have a drill press and never thought about fixing the worn gear in place to align the bit and follow up with the new one. I got to remember that one. I used the small bit method, working my way up to a larger bit. I also drilled half depth on one side and followed up on the oppisite. the next pass with the larger bit followed the prior path followed by the third bit. It looked pretty clean when I finished. I then installed the new roll pin. I removed the 1/8" high pressure port in my truck's transmission and replaced it with a temp sensor. This seems to work well as I found I really was looking to track the temperature base-line. Temps usually are about 10-20 degrees higher than engine temperature while towing (200-220) on my 93 K3500 Chevy, temps rarely reach 180 when not, exept when in stop and go traffic. I have heard that the pan is a better place to measure though. On the note of the transmission cooling, I also had installed the cooler prior to the radiator mounted cooler. I figured the higher deta temp of fluid leaving the transmission would result in the most efficent use of the fluid to air cooler. The water to fluid cooler is much more efficent, but I did not want to send the hottest fluid to the radiator cooler first. I need to see how the cooler on my Barth is connected.... Thanks for all the input! Doug Bywaters Near Skyline Drive Virginia! | ||||
|
Captain Doom |
Good call - the transmission needs to be warm to operate with best efficiency and longevity - in really cold temps, light load, the radiator may actually warm the transmission... Rusty '94 28' Breakaway: MilSpec AMG 6.5L TD 230HP Nelson and Chester, not-spoiled Golden Retrievers Sometimes I think we're alone in the universe, and sometimes I think we're not. In either case the idea is quite staggering. - Arthur C. Clarke It was a woman who drove me to drink, and I've been searching thirty years to find her and thank her - W. C. Fields | |||
|
| First Month Member |
I used to think that way. It makes the most sense to me that way. But, now, GM/Allison went and confused me. My earlier (orange and white/orange)Chevrolet chassis service guides both say aftermarket external oil to air cooler should be installed in series. "The hot oil line should go first through the aftermarket cooler then into the radiator to maintain proper minimum temp of the trans in low ambient temps." BUT...a later (green) version of the same manual says the opposite. Says it should be installed "after the GM trans cooler". They go on to say to cover the after-market cooler in "extreme cold weather". But, they don't say how cold is extreme. Below freezing? Below zero? In Sioux Falls or Fargo, extreme cold is below minus 20. I know. And I wonder why they changed their recommendation. I have spoken with an engineer who did some testing on this, but he was so adamant on the subject he was disinclined to discuss it. It still makes the most sense to me to dump the trans heat to the air first instead of directly to the coolant. Maybe it would depend on what heats up more, the trans or the engine. My 502 has a Siamese block, so I am quite protective of coolant temperatures. However, with a conventional installation, with the aftermarket cooler first in line forward of the radiator, most or all heat from the aftermarket cooler goes into the radiator, by way of heated air, anyway. With the aftermarket cooler second in line, but in front of the radiator, most of the transmission heat goes into the radiator first and the remainder goes into the air flow, and into the radiator anyway. Certainly, mounting the aftermarket cooler away from the radiator would change the discussion. It would require careful installation, at least for boondockers, and would probably require a fan. Maybe I can mount it above the windshield, like an old Bluebird AC condenser. . 84 30T PeeThirty-Something, 502 powered | |||
|
| The Old Man and No Barth |
Re: differences in book recommendations. Over a long career in shade-tree mechanics, I have observed that a lot of "expertise" is based on belief, rather than experience or experimentation. Indeed that is suggested by the engineer who refused to discuss his recommendation necessitating covering an auxiliary cooler in cold weather. When your mind's made up, and you don't want to be confused by facts, your best course is shut up & don't talk about it. Reason suggests running the hot fluid through the auxiliary first to reject as much heat as possible, then running it through the radiator to temper it to engine coolant temperature. John Geraghty, erstwhile Trailer Life performance guru, a man well-respected by both El Segundo Bill & myself, said the most critical aspect of auxiliary cooling is to be sure it doesn't restrict fluid flow. Of course, when all else fails, one can always read the directions. Trans. cooler manufacturers usually tell you where & how they want them installed. Re: fans. My most recent S.O.B. had a yawning gulf between the radiator & the grille, with no place for an auxiliary cooler near the radiator. I bought a cooler with a built-in fan & mounted it right behind the grille. When the fan went off it sounded like a siren, but I always knew when it was working. | |||
|
| Powered by Social Strata |
| Please Wait. Your request is being processed... |
This website is dedicated to the Barth Custom Coach, their owners and those who admire this American made, quality crafted, motor coach.
We are committed to the history, preservation and restoration of the Barth Custom Coach.
We are committed to the history, preservation and restoration of the Barth Custom Coach.