Go to... | Start A New Topic | Search | Notify | Tools | Reply To This Topic |
| 1977 Barth, 24' Class A Motorhome | Login now/Join our community |
Is the Rusted area above the window structural necessary? Is it just to hold the storage area above, hide the wiring for the top lights and support the mirror/visors? Is the window safe? Any idea? 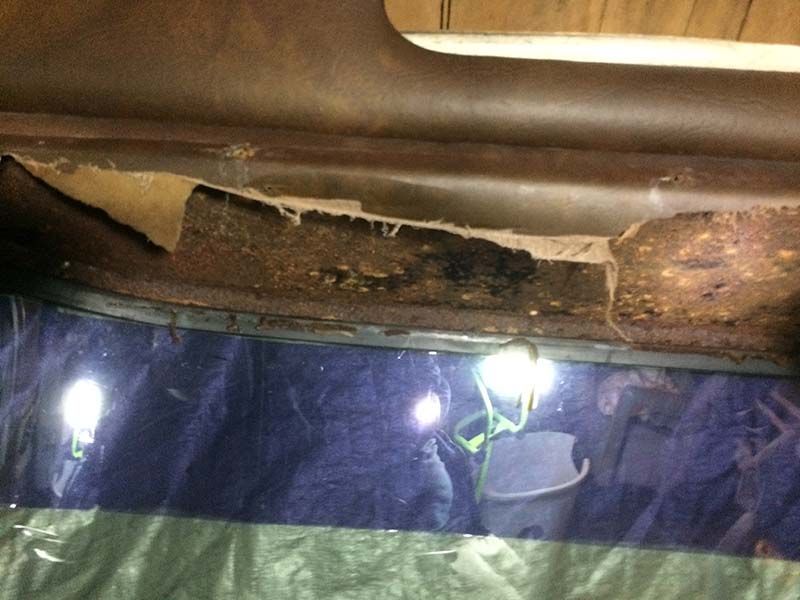  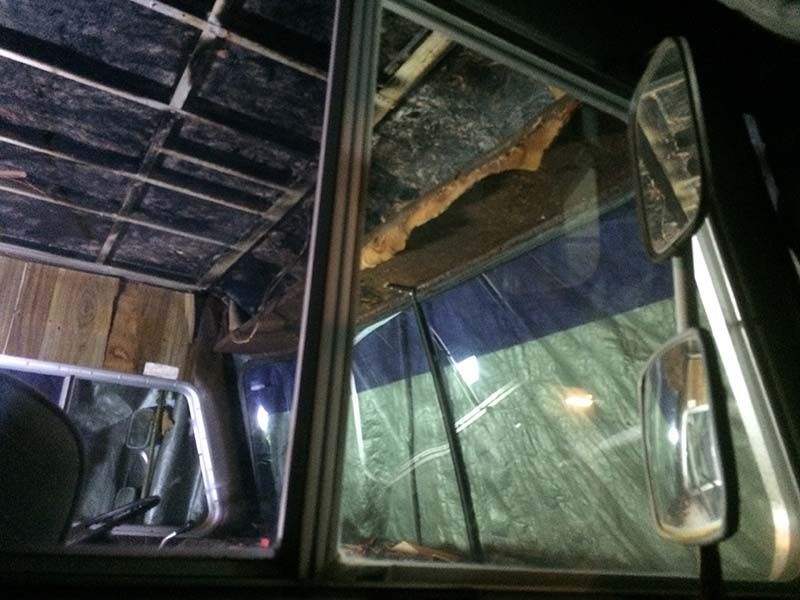 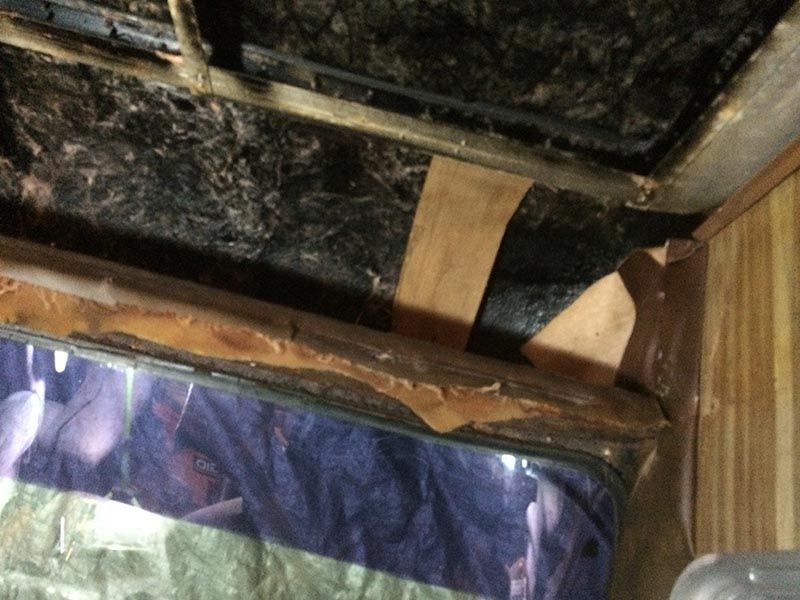 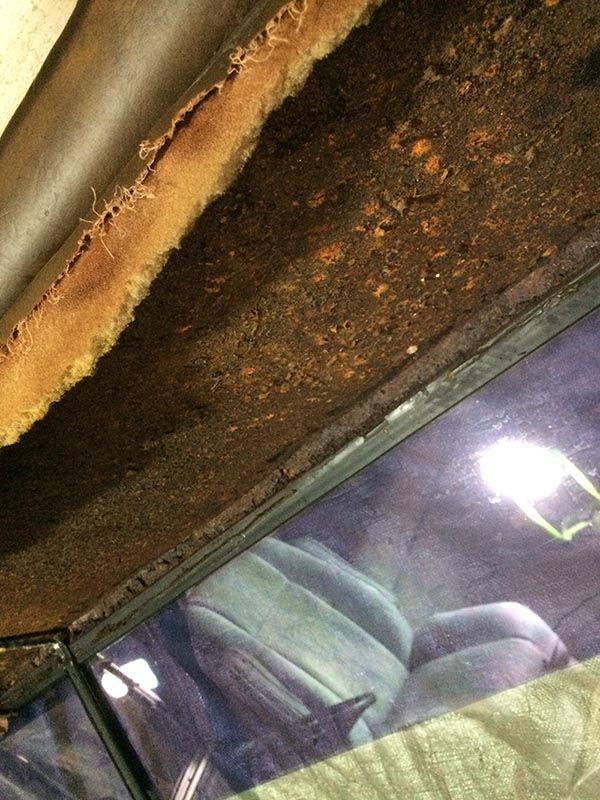 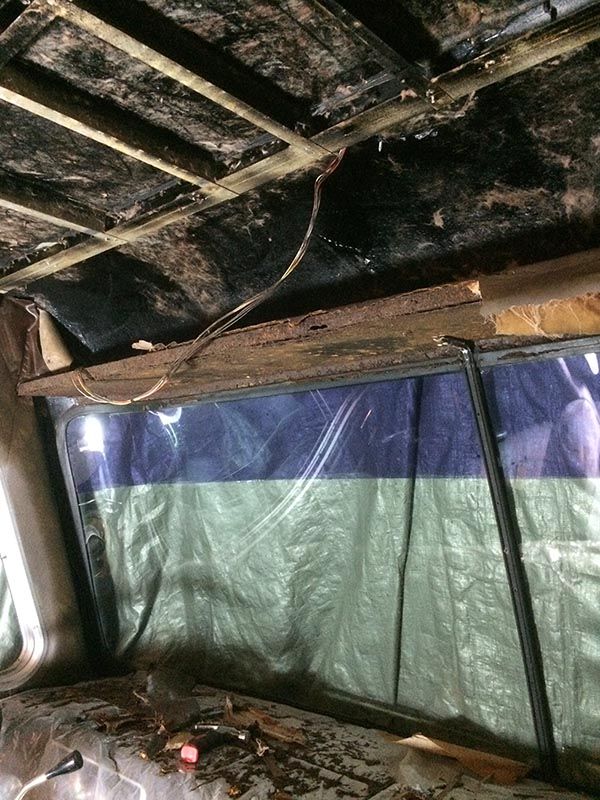 | ||||
|

 3/11 3/11 |
On my 93 Regency it is part of the truss system that holds the front cap in place. The tubular parts should be welded to what in a car is the A pillars. The repair is to cut out the horizontal piece on both sides where it attaches to the vertical tubes and weld in a new one. The rust is indicative of the front fiberglass cap leaking over the years so in my case we trimmed the new tube to length and then had it powder-coated, leaving one inch for re-welding. Drill all the mounting holes before you powder-coat and apply never seize to the screws when reattaching the interior. I found this had also attacked the lower front cage area and the rear area around the engine. My brothers '84 had the side tubes under the compartments rusted through as well. The repairs are not difficult, just time consuming and requires welding and then rebuilding. 1993 32' Regency Wide Body, 4 speed Allison Trans, Front Entry door, Diamond Plate aluminum roof & 1981 Euro 22' w Chevy 350 engine and TH 400 tranny | |||
|
| 06/08 |
My 77 looked very similar to yours. Water leaking at the windshield seal for years was a culprit in my case. Mine also has some corrosion damage of the exterior aluminium from the same water intrusion. In mine I removed as much of the loose rust as I could and determined it was damaged but still structurally sound. This is a judgment you will need to make. I cleaned all the silicone and other sealants applied by a previous owner and resealed it with the proper polyurethane sealer designed for sealing windshields. I bought it at NAPA and it sealed it up great after testing with a pressure washer. This stuff will stick to everything so make sure you tape off everything you dont want it on. After that I sealed all the corroded metal with rust encapsulator like "POR" to try and stop the corrosion from getting worse. I even pored it down the "A" pillar's and could see it coming out the corrosion in the aluminium skin so I know it reached it. I was careful removing the vinyl so I was able to reinstall it with new foam. Five years later no leaks. NT | |||
|
Unfortunately with mine there is no structural integrity. It is completely rusted through you can see through the tubing and different points. I think if this is a key structural component like Tom suggests I need to do as he suggests and weld the piece in there though I have no experience with welding at all. Hopefully the shop can do this I've also got some friends that are familiar with welding so I'm going to try that today I'm going to pull off the vinyl on the sides and see how far down this goes. | ||||
|
| 3/11 |
You can minimize the cost of repair if you strip off all the surrounding parts before you remove the old tube. The aluminum that is riveted to the steel will not tolerate welding temps so you have to remove it or block it at least three inches from the weld area. I would use TIG welding to isolate and minimize any splatter. Drill out the rivets and peel it away. Look carefully at the aluminum and you might find it corroded from galvanic action. The good news is that if you have to replace any aluminum you just cut it out, make a new patch and rivet them together. The Barth will not look any worse as it already has hundreds of rivets! 1993 32' Regency Wide Body, 4 speed Allison Trans, Front Entry door, Diamond Plate aluminum roof & 1981 Euro 22' w Chevy 350 engine and TH 400 tranny | |||
|
| 1/12 |
Mine is still apart (Slowly Going Back Together) I Have Removed Quite a few Steel Beams And Welded In New Ones, Barth Does Not Paint Or Coat Any Steel And That Is Why It Will Rust. I Have Cut Out What Is Bad And Replaced With New And Cleaned And Painted Every Exposed Piece Of Steel I Came Across, It Is A Lot Of Work But The End Result Is rewarding!! There Are Several Good Rust Products Out There! Don't let it Discourage You Just Remember The End Result.I Have Spent The Last 10+Years working on Motor Homes And You Will Not Find Another Brand As well Constructed As A Barth, I Started With A 1972 Winne Brave, Really Cool Motor Home Very Poorly Built!! Remember Barth Motor Homes Are #1 As Far as I'm Concerned, ( And That Is My 2 Cents)!!! Richard & Robin
| ||||||
|
My problem is I don't know a thing about welding or riveting. Are the necessary tools something I can just go buy and learn to use? | ||||
|
| 1/12 |
Riveting is pretty straight forward and it would not be that difficult, the Welding I would leave to someone who does it. Richard & Robin
| ||||||
|
| 3/11 |
Just contact a tube bending company and give them either the spec's or the old piece and they can do it for you. You will spend about $100 for the job and then go to a powder coating place and get it coated. That should be a minimum charge job. Then take it to a welder and have him/her do the install. I have done font, back and sides of our Regency and all has been well since. But remember, the maintenance never stops! 1993 32' Regency Wide Body, 4 speed Allison Trans, Front Entry door, Diamond Plate aluminum roof & 1981 Euro 22' w Chevy 350 engine and TH 400 tranny | |||
|
What steel is in the sides? Similar tubes? Where? Did you pull everything out? | ||||
|
| 3/11 |
Above the floor level all the beams are aluminum. Below they are steel and the front, rear and sides where the compartments are located there are steel tubes ranging from 1" square to 2" square that form the chassis. These are all built by the chassis company, on mine from Gillig, and they will rust quickly without some coating. I replaced the tubes around the engine bay and the Front cap around the bumpers. My brother replaced the tubing along the compartments as he found them rusted. To do this you need to drill out rivets and pull the aluminum skin away then cut out the bad stuff with a sawsall. You have to support the floor or compartment (water tank etc.)before removing the tube. 1993 32' Regency Wide Body, 4 speed Allison Trans, Front Entry door, Diamond Plate aluminum roof & 1981 Euro 22' w Chevy 350 engine and TH 400 tranny | |||
|
So .. in the walls in the middle? Like .... .... take out the cabinets and strip the walls to find them? This sounds like a nightmare .. way outside DIY ... At this rate I'll be on the road in 2 years ... | ||||
|
It sounds more and more like i want to just gut the whole dang thing and start over keeping the engine the body and ... that's about it. What about the frame itself? If doing all this would someone just go to a shop and pull off the body and sandblast the frame and seal it and so on? Wouldn't all the steel be on the way to rusted and unstable? | ||||
|
I had a guy come by who does welding. While he was there i tore off the vinyl/metal wrapped around the tubing on the side. That tubing looks fine. Way sturdier and what the aluminum body is screwed into. I never expected that would be solid. So I can just get that tubing cut out and weld it back to those. The horizontal tubing is nearly nothing compared to the stuff on the sides. The steel on the sides are all formed to the angle of the windshield. Is this what you've replaced as well? This would have to be custom bent to very exact measurements wouldn't it? Regardless I think its fine. I guess this would extend down to the frame so I'll crawl under when its warmer than the single digits here and see if its rusted where it connects to the frame but its smooth and not rusty at all so I'm very happy about that at the moment. | ||||
|
Any suggestions on what gauge of steel, type of steel tubing? | ||||
|
| Powered by Social Strata | Page 1 2 3 4 |
| Please Wait. Your request is being processed... |
This website is dedicated to the Barth Custom Coach, their owners and those who admire this American made, quality crafted, motor coach.
We are committed to the history, preservation and restoration of the Barth Custom Coach.
We are committed to the history, preservation and restoration of the Barth Custom Coach.