Go to... | Start A New Topic | Search | Notify | Tools | Reply To This Topic |
| Removing Air Injection 454 | Login now/Join our community |
 8/11 8/11 |
Question for you Barthers out there who have removed the worthless air pumps and associated hardware and tubing. After spending some time looking over the A.I.R./E.G.R system of components I've come to the conclusion that almost nothing works. EFE valve is corroded open and does not move. Right bank air pump has zero output. Left bank hose wasn't attached. Air divert solenoids maybe they work but with no air going through kinda pointless. A.I.R. divert module disconnected I guess that's why check engine light does not come on. EGR valve maybe it works. There is no vacuum tube going to the vacuum diaphragm motor, doesn't have heat riser anyway. I'm thinking if anything I should leave the Evaporative Emission Control System with all it's vacuum lines and vapor hoses attached, I think it's cool being able to burn off fuel vapor. However after tracing down all the vacuum tubing going to the canister purge valve and the carburetor bowl vent valve plus the vapor hose going to fuel tank and carb float bowl. There is no tube going back to the air cleaner from the evap canister to burn off the vapor, the tube that is supposed to go there goes to another canister that has a atmospheric vent. So I figure that isn't needed either. So what has been recommended to me is to go old school which I would like to do. So what I have left would be vacuum lines that go to the PVC valve, vacuum advance, transmission, vacuum vent actuators, vacuum gauge. Does this sound about right? Do I need to make any other changes? I've owned my Barth for a year now and what got me going on this project is the motor has developed a hesitation on acceleration acts like the ignition is cutting out at times. I have no history of any maintenance of the Barth and everything looks original so I need to change plugs, wires, distributor, fuel filters. The flow through the carburetor looks good accelerator pump injects a nice stream of gas. So I figured I should give myself some room and start by getting rid of the emission system. Any advice would be greatly appreciated. Thanks | ||
|

| Official Barth Junkie |
I ended up going old school since nothing worked or was connected anyway. Getting rid of the extra vacuum lines will avoid vacuum leaks. I still have some leaks in my dashboard climate control (it is currently disconnected also.) The hesitation may be vacuum leak/vacuum advance related. Also be sure to check that old distributor cap for red dust and the advance weights. Be sure your fuel system is delivering enough fuel at all times, too. As for AIR injection manifolds, they are in the way big time. I first removed the solenoid valve and hose, then capped the air tube. Since I was never able to loosen the flare nuts that attach to the headers, I sawed them off leaving about 1/2" stumps, plugged them with pipe plugs, peened the tubing to be sure. Sooo much easier to access plus, etc. My AIR module still shows the check engine light on startup! (doesn't DO anything, though.) I find it disappointing to have this nonfunctional warning light when there is no warning for low oil pressure, high temps, etc. I'm thinking I will figure out some way to tie the oil pressure to the AIR check light... | |||
|
| 8/11 |
 Stage 1 complete, a table full parts, looks so nice and clean with all that removed. I can actually see my fuel pump. In the process I also removed the air conditioning compressor, system leaked, no refrigerant left in it. And from what I've been reading it's a good idea to take the AC load off the engine. If I need cooling I'll just run the roof unit. Plugs, wires, cap, rotor and a clean fuel system are a nice way to get confidence in a recently purchased MH. A direct quote from Bill H. Great advice that is next on my list. | |||
|
| Official Barth Junkie |
It's deja vu all over again! I recognize those parts! I should have weighed them... probably 150 lbs. I also took out the AC condenser in front of the radiator to allow better air flow. You can already appreciate how much easier future access will be! If you remove the factory AC you may be able to double up on the power steering belts, great peace of mind there. 9708-M0037-37MM-01 "98" Monarch 37 Spartan MM, 6 spd Allison Cummins 8.3 325+ hp | |||
|
Glassnose Aficionado |
Steve, I didn't like not having idiot lites either. When the OP gauge acted up, pegging out whenever the key was on, I found the sender on the lower drivers side of the engine toward the front, determined the sender was the culprit, went to NAPA and got a brass splitter, a gauge sender, and an idiot lite sender, hooked up the gauge as before, and put a small LED strip that Lenny gave me above the speedo with a wire to lite sender. It's very bright, so I'll notice it if the pressure drops, and it also tells me when the key is on and the engine isn't running. I'd like to do the same with the temp gauge but haven't investigated that yet 79 Barth Classic | |||
|
| Official Barth Junkie |
That's a great idea! Since I already have the truly "idiot" check engine light and an oil pressure switch for the fuel pump, I was planning to connect the two. Still thinking about the easiest (laziest!) way to intercept the switch and the AIR module to put that light to work. I'm still surprised they didn't come with idiot lights. Oops... never mind, I guess I'm the only idiot with a Barth... Here's a shot of my right side... Look ma! no AIR! The stumps are still on the header tubes but not really in the way anymore. (The plug wires are loose because I was changing plugs, so easy now!) Also notice the short dipstick and filler tube and the Barthmobile inspired air dam. (One of these days I've got to clean and paint the top side... the oil pan and front are all clean, you can't even see them, oh well.) 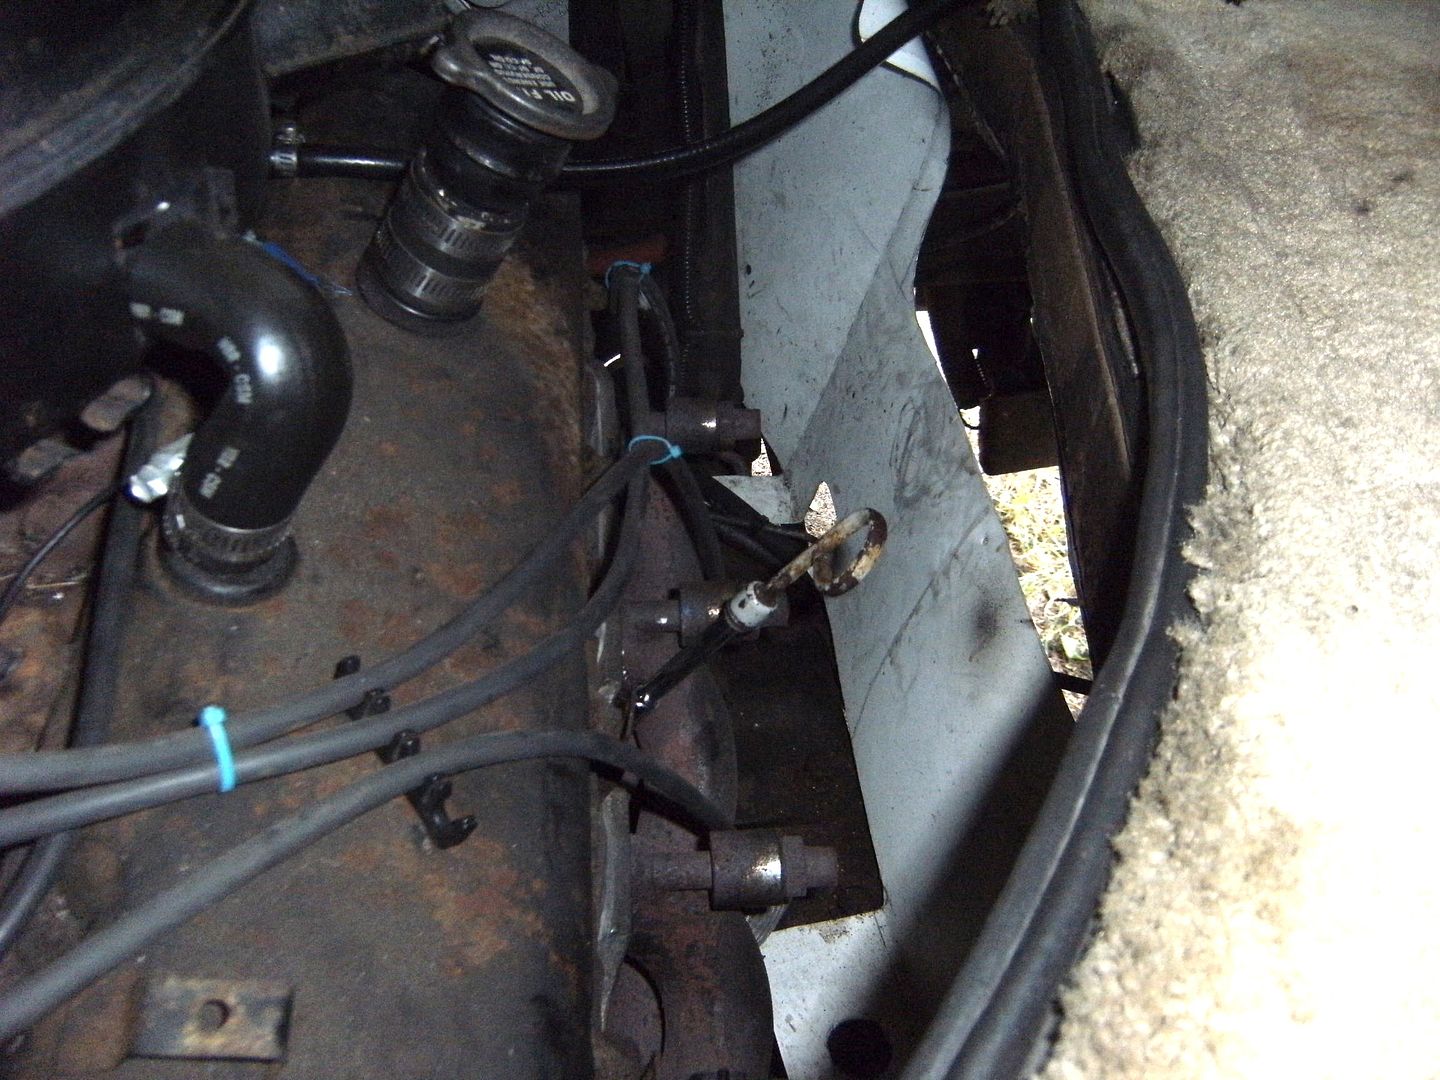 9708-M0037-37MM-01 "98" Monarch 37 Spartan MM, 6 spd Allison Cummins 8.3 325+ hp | |||
|
| 8/11 |
I just removed mine today, started to cut the tubes than realized I could just put a little pressure on the tubes and they brake right off, made that easy! Figured I'd make room for new plugs and wires, you're so right about all the room you gain. Really looking good! Well today I ordered from Summit Racing Steve's #850001-1 Summit distributor, Bill H's plug wires #ACC-8871 and plugs AC Delco R44T, also will order Thermo Tec Heat Sleeves also recommended by Bill. Wanted to wait so I can order the right ID. So much great information and help on this site. It is a great idea to have a idiot light for temp and oil pressure, I try to normally watch the gauges but not always so a hammer dropping on my head would be nice! Also I would like to get a fuel pressure gauge installed, I've already replaced the oil pressure and vacuum gauges so now I can get a matching Auto Meter gauge for fuel pressure, a little pricey if you use the isolator tube. | |||
|
"Host" of Barthmobile.com 1/19 1/19 |
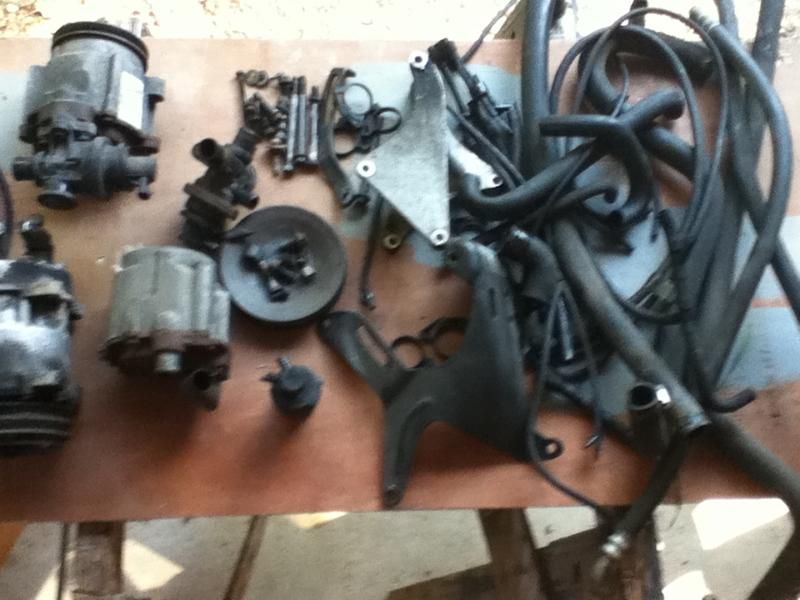
Found these in the upload site and figured they belonged here. How are you making out on this? 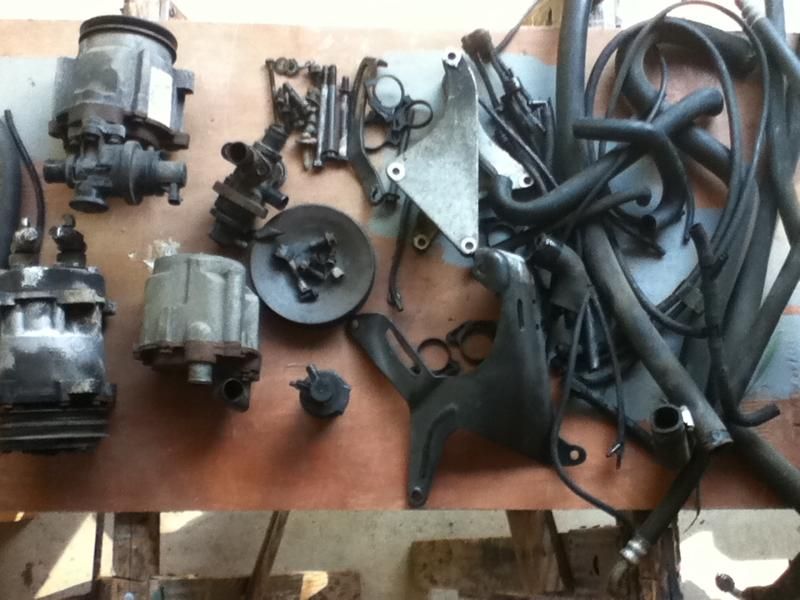 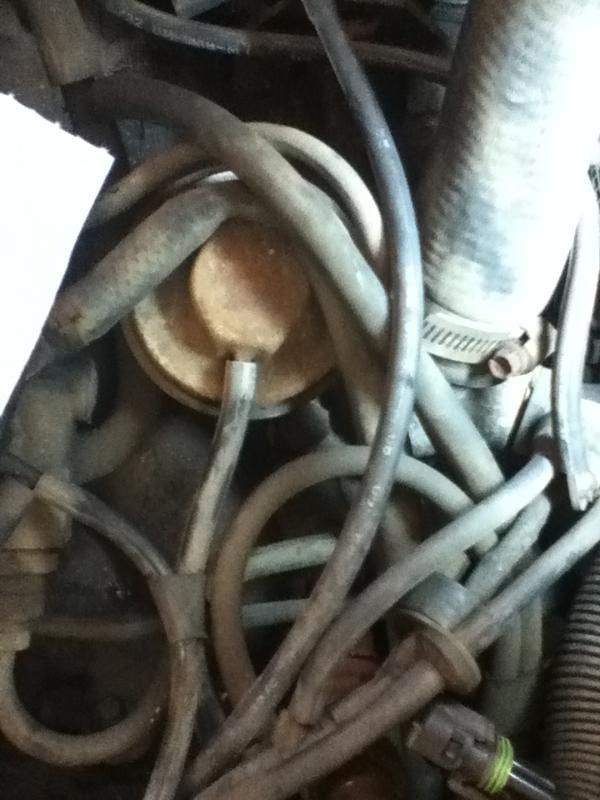 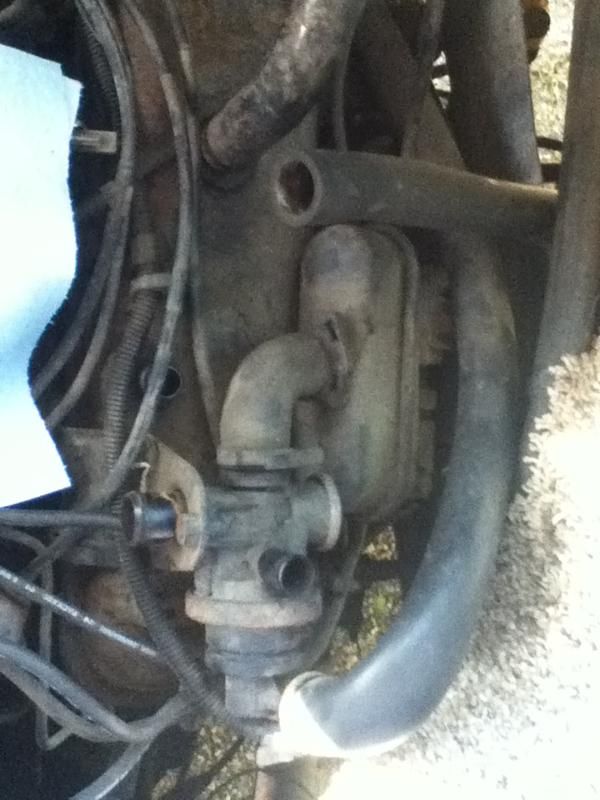
| |||||||||||||||
| ||||||||||||||||

| 8/11 |
Thanks Bill Yeah I thought I was doing good loading the pics than I saw only the link posted. Well we had some nasty weather come through here for a few days so that pretty much took away my initiative to do anything, other than my job. Much better weather today so I worked on getting the manifold air injection ports (the tubing) drilled out and tapped with a 3/8" NPT pipe tap then plugged with a 3/8 pipe plug. Got the right bank done. looks good. I thought man this would be a great time to install headers but than I figured that's a project for another day. I need to get new plugs, distributor, plug wires and new vacuum lines installed, set timing and see how she runs. | |||
|
Anybody know the alternator serpentine belt size or part number when the right lower air pump is removed? | ||||
|
| Official Barth Junkie |
Apparently around 1986 they made em with two air pumps, and up to four belts! Mine originally had two pumps. One was mounted on pass side of engine and shared the flat belt with the crank, water pump and alternator. 85 1/2 to 89 OEM (with AIR pump): GM 14087530 (1422 mm) Evidently the later versions did not have the air pump on that side and ran the flat belt from crank to water pump to alternator. When I removed the pump from that side, I used the "no pump" belt and it worked. 1990 OEM (no pump) GM 10085787 (1340 mm) CarQuest crossed it to: BVB K5256 (20mm x 1355mm) which 15 mm longer but fits perfectly. good luck! 9708-M0037-37MM-01 "98" Monarch 37 Spartan MM, 6 spd Allison Cummins 8.3 325+ hp | |||
|
OK thanks, picked up an AC Delco belt 6K525 that should work. | ||||
|
Belt fits perfect. Anybody know the size and type of threads on the plugs I will have to buy to replace the air tubes?  | ||||
|
Pretty sure now it's M22-1.5 thread. | ||||
|
| Powered by Social Strata |
| Please Wait. Your request is being processed... |
This website is dedicated to the Barth Custom Coach, their owners and those who admire this American made, quality crafted, motor coach.
We are committed to the history, preservation and restoration of the Barth Custom Coach.
We are committed to the history, preservation and restoration of the Barth Custom Coach.